Cleaning Business Before and After Content (the Arrival Routine That Makes It Postable)
A deep clean has no undo, so the before photo has to happen on arrival, from fixed spots, before a single surface is touched. The five frames that make a cleaning job postable, and which jobs are worth shooting at all.
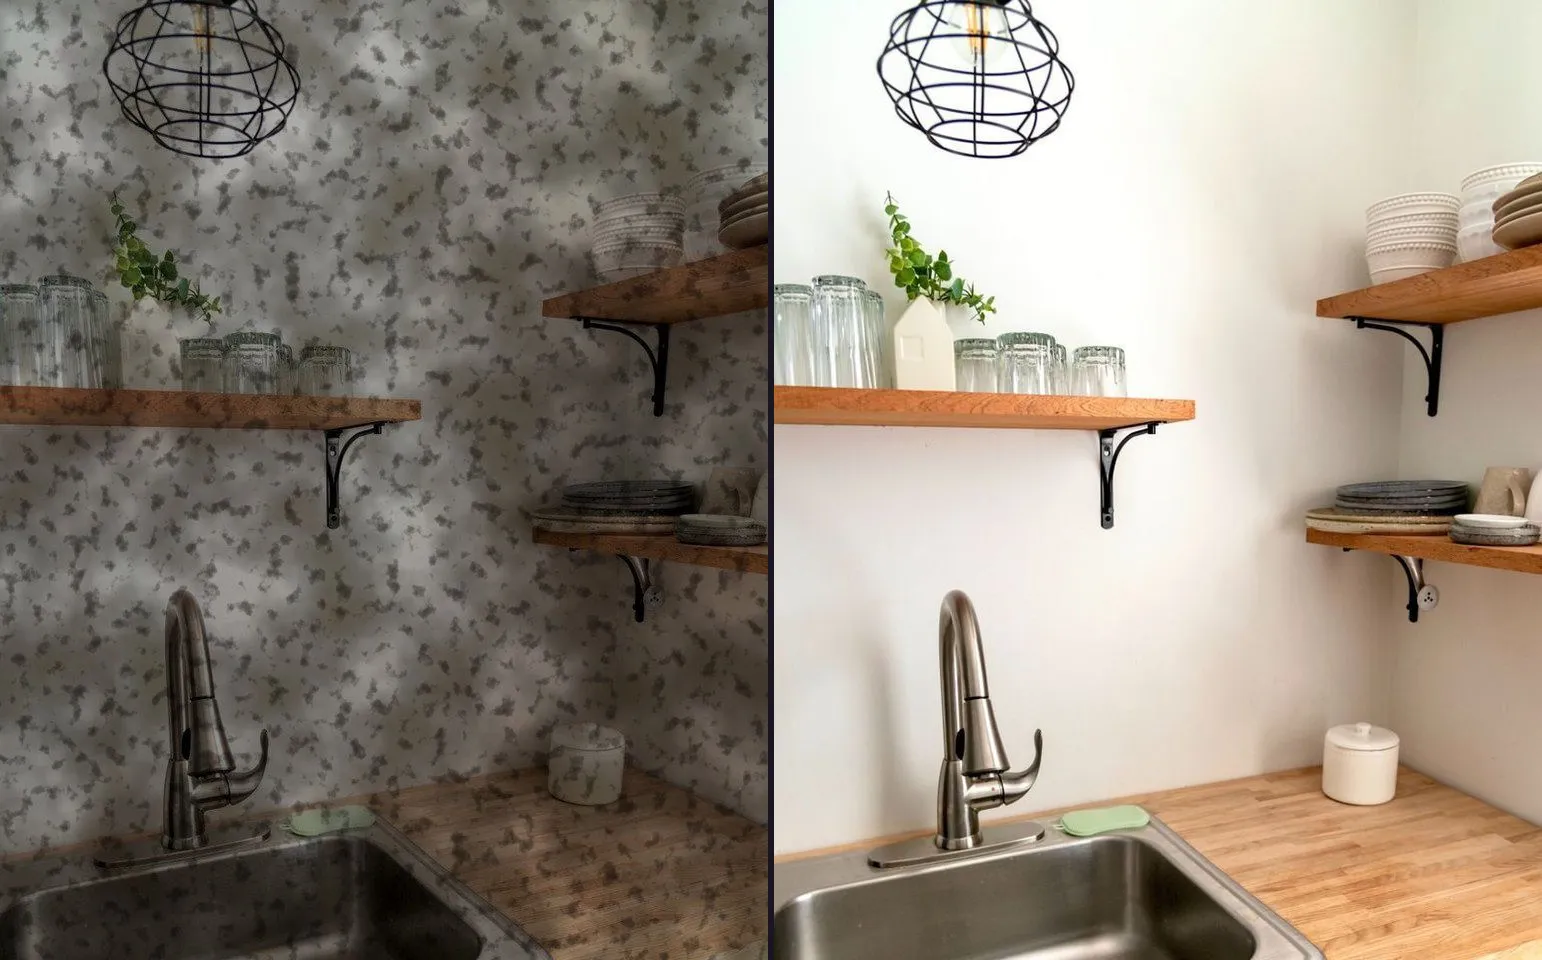
You have just walked into a job. The van is still being unloaded, the client has handed you a key and gone to work, and you have maybe ninety seconds before the first bucket comes out and the room stops being a before. This is the moment cleaning business content either happens or it does not, and unlike almost every other trade on this site, there genuinely is no going back for it. A driveway can be re-wetted. A haircut cannot be undone, but the client can at least describe what it looked like. A kitchen that has already had one wipe down the counter is a kitchen you can no longer photograph honestly as untouched.
That is the whole method for this trade, and it is simpler than the ones the app’s other trade pages have to argue for. You do not need a technique. You need a habit you run on arrival, every time, including the jobs you never end up posting.
Five frames before you touch anything
On arrival, before you unload, before you open a window to let the smell out, before you move so much as a chair, take five photographs from wherever you are standing:
- The doorway, straight in. Whatever room you are about to clean, stand in its entrance and shoot the whole room from that spot. This becomes your fixed mark, and you will come back to exactly this position for the after.
- The main fixture. The sink, the hob, the bathtub, whatever the room’s centrepiece is and whatever is going to change the most.
- The floor at your feet. A low, close frame of whatever is directly in front of you. Floors carry a surprising amount of the story in a deep clean and they are the easiest thing to forget to shoot.
- One wide shot of the whole space, taken from a few steps back if the room allows it, or from the same doorway spot at a wider framing if it does not.
- The single worst detail. The grout line that has gone black, the oven glass under a layer of carbon, the tide mark around the bath. Every deep clean has one thing that is worse than the rest of the room, and it is usually the photograph that convinces someone the before was not staged.
None of this needs a tripod or a plan beyond doing it in order, on every job, before the first surface is touched. The habit is what protects you, not the individual photograph. A before you decide to take partway through the clean is already compromised, because the surfaces you have already wiped are no longer in their arrival state, and a viewer who spots one clean patch in an otherwise dirty before photo will read the whole pair as staged.
Move-outs and post-construction photograph differently from a weekly clean
Not every job is worth shooting, and saying that plainly is more useful than pretending otherwise. A weekly maintenance clean starts from a home that was already reasonably tidy, because that is what a maintenance contract is for. The honest after of a job like that looks like a home that was already reasonably tidy, and no amount of careful framing turns a true result into a dramatic one.
Move-outs and post-construction cleans are a different job entirely, and they are the two worth building your content habit around. A move-out has months, sometimes years, of buildup behind it: a tenant’s last clean was a while ago, and the neglect is real rather than manufactured for the camera. A post-construction clean has a different kind of mess, plaster dust in every corner, paint spatter on fixtures, a fine film over everything that was in the room while the trades were working, and it photographs as dramatically as it actually is.
Both jobs reach a different buyer from a weekly clean, and it is worth knowing which one you are shooting for. A move-out pair speaks to landlords and property managers deciding who gets the next turnover job. A post-construction pair speaks to renovation contractors and builders deciding who gets the cleaning line item on the next site, which is a different decision maker from the family booking a fortnightly tidy. Post the honest weekly-clean after too, if you want a record of it, but do not expect it to be the pair that books the next job.
The doorway is the only repeatable mark in a small room
Kitchens and bathrooms are the two rooms this trade photographs most, and they are also the two rooms where the standing-spot advice the rest of this site gives, back up, find a fixed outdoor object, use the same corner, runs out of room to work with. You cannot back away from a kitchen counter the way you can back away from a driveway. There is often nowhere to stand except roughly where you are already standing.
The doorway solves this by being the one spot in almost any kitchen or bathroom where you can stand in both the before and the after without moving anything out of your own way first. It is not a stylistic choice so much as the only option left once you rule out standing inside the room itself, which usually means standing inside a space you are about to fill with cleaning equipment. Use it, and say so if you are writing a caption: “same doorway, both shots” is a small line that does real work, because it tells a viewer exactly what they are looking at rather than leaving them to assume.
Two things break a doorway pair that would not break an outdoor one. A cupboard or a cabinet door left open in one frame and closed in the other changes the whole shape of a small room, so check every door in frame before you shoot. And the light in a kitchen or bathroom usually comes from a single overhead fixture plus whatever window is in the room, so shoot the before and the after at a similar time of day if the job allows it, the same way how to take matching before and after photos argues for every trade on this site. A kitchen photographed at nine in the morning under a window and again at six in the evening under a bulb is not really the same room in two photographs, even though nothing about the clean was dishonest.
Getting the pair to actually match
Beyond the doorway and the light, the usual matching rules apply and they matter more here than in most trades, because a small room magnifies a small mismatch. Hold the phone at the same height for both frames, roughly chest height if you are standing, since a foot of difference in a doorway shot changes what is visible over a counter or into a cupboard. Use the 1x lens rather than the wide 0.5x: the ultrawide bends straight lines, and a kitchen full of straight cabinet edges and worktop lines shows that bending immediately.
If a job runs long enough that the light genuinely changes between your arrival photos and the finished ones, Ghost Camera is the free feature built for exactly that gap. It overlays your before photograph on the live camera preview at an opacity you set yourself, so you can line the after up on the same doorway frame even hours later, without needing to remember the exact spot you were standing in. It is free and ungated, the same as every comparison mode, every filter and the full label editor, all of which the free tier gives you outright rather than behind a watermark.
Turning the pair into a post
Once you have a matched pair, the flow in the app is the same one every trade on this site uses. Pick the two photographs, choose a comparison mode, choose how the reveal plays if you are exporting a video, set the length, and export at the ratio the platform wants.
For a doorway shot, which tends to come out tall and narrow because both kitchens and bathrooms are usually taller than they are wide from that standing spot, Slider is the safe choice for a reveal video, since it is the one reveal that plays correctly in a video today. Side by Side and Tap to Switch both read just as cleanly for a still image, and Tap to Switch is worth reaching for on a close fixture, a sink, a shower screen, an oven door, because it lets a viewer set their own pace over something small rather than watching a timed wipe move past it before they have actually looked. The video exporter currently derives its layout from the reveal animation rather than the comparison mode, so for now, Side by Side and Tap to Switch are choices for the photograph you post rather than the video.
The free tier is worth knowing exactly rather than discovering at the export screen. Free gives you three exports a day, each behind a short ad, with a watermark on, the two most common ratios, 9:16 and 1:1, Slider Reveal as the only video reveal, and no music. What is free and completely ungated is everything the method above actually needs: every comparison mode including Tap to Switch, every filter, the full sticker set, the label editor, your business name and logo on the frame, and Ghost Camera. That second list is the one worth leading with, because none of the arrival routine above depends on paying for anything.
Pure White and Minimal both suit a kitchen or bathroom pair, since a clean, pale frame does not compete with surfaces that are already meant to look bright and bare. Bold Coral is the better choice if you want the post itself to stop a scroll rather than sit quietly, useful for a move-out or post-construction reveal you are posting to build the business rather than to document a single job. All three sit in the clean and bold categories if you want to see the rest of each pack.
Where to check the pair before you post it
Before committing to a video, drag the pair through the free before and after slider on this site. It runs entirely in your browser, nothing leaves your device, and it is the fastest way to see whether a doorway shot actually holds together. A pair shot from the same spot, at the same height, sits steady as the handle moves across it. If the framing jumps, or a door that was open is suddenly closed, the mismatch is in the shoot, not something a template will fix.
If a pair still looks off after that, why your before and afters look fake covers the seven usual causes, most of which apply to a kitchen or bathroom exactly as written even though the guide was not built around one room.
Five photographs, on every job
The arrival routine costs you ninety seconds and produces five photographs you would otherwise never have. Run it on every job, including the ones that will not end up posted anywhere, because the only way to guarantee you have a before when a job turns out to be worth showing is to have already taken one before you knew that. Save the move-outs and the post-construction jobs for the content that actually books work, and post the weekly cleans, if at all, as the honest, undramatic record they are.
For the caption and hashtag rotation the trade actually uses, the cleaning business hashtag page has the current pool for Instagram and TikTok. The federal pay numbers behind the trade are on the house cleaners data page, if you want the counts rather than the vibe. And if you have not shot a pair on the app yet, the app is the free download the rest of this page assumes.
Common questions
- What photos should I take on arrival at a cleaning job?
- Five frames, taken before you touch a single surface: the doorway looking straight in, the sink or main fixture, the floor at your feet, one wide shot of the whole room, and whatever the single worst detail is, the grout, the oven glass, the tide mark in the tub. Take all five before you unload a bucket. A deep clean has no undo, so a before you did not take on arrival is a before you will never get.
- Which cleaning jobs make the best before and after content?
- Move-outs and post-construction cleans, by a wide margin. Both start from genuine neglect or genuine mess, months of it in a move-out, plaster dust and paint spatter in a post-construction clean, so the after reads as a real transformation to anyone who was not on site. A weekly maintenance clean starts from a home that was already reasonably tidy, and the honest version of that after looks like a home that was already reasonably tidy, which is a true result and a flat photograph.
- What's the fixed point to shoot a kitchen or bathroom from?
- The doorway. Both rooms are usually too small to back away from a fixture and still fit the whole room in frame, which rules out most of the standing spots that work outdoors or in a living room. The doorway is nearly always the one place you can stand in both the before and the after without moving furniture or a person out of the way first, so it becomes the repeatable mark by default rather than by choice.
- Should the before photo be taken before or after the deep clean starts?
- Before. Not before the deep clean of the room you are cleaning today, before anything at all happens on the job, including moving a chair out of the way or opening a window to air the space out. Any of those small resets change what the before shows, and once the bucket is out and the first surface has been wiped, that particular before is gone.
- Which comparison mode suits a kitchen or bathroom before and after?
- Slider, if you want a reveal video, since it is the one mode that plays correctly in a video today. Side by Side suits a doorway shot as a still image, since both rooms photograph as tall, narrow frames from that standing spot. Tap to Switch suits a close fixture as a still, a sink, a shower screen, an oven door, where the detail is small and a viewer benefits from setting their own pace rather than watching a timed wipe move past it.
- How do I check whether a cleaning before and after actually matches?
- Run the pair through the free before and after slider on this site. It works entirely in your browser, nothing uploads anywhere, and you drag the handle across the two photographs the way a viewer would. A doorway pair shot from the same spot holds steady as the handle moves. If the framing jumps, or a cupboard door is open in one frame and closed in the other, the mismatch is in the shoot rather than something a template will cover up.